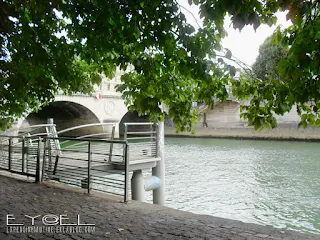
I meant to publish some pictures I took this summer, but I felt that all this greenery might bring on a longing for warmer days so I thought I'd make them match the actual season. This is a dead simple manipulation suitable for beginners provided you have an image editing software. As usual, if you do not use Paint Shop Pro, you'll need to figure out the equivalent tools.
 |
 |
Materials
- a summer landscape photo
Instructions
1. Open a copy of the image you wish to manipulate.
2. Apply Tone Mapping on the following hues:
72° (yellowish green) > 36° (orange)
108° (green) > 10° (reddish orange)
144° (blueish green) > 0° (red)
180° (cyan) > 208° (sky blue)
NOTE: To improve the effect, I've slightly decreased saturation and luminosity then changed the overall colour temperature using the Automatic Colour Balance dialog, correcting colour cast and choosing a warmer tone. This type of setting is the same as tone mapping except it changes colour temperature (to colder or warmer tones) globally instead of selectively. The output is less accurate however it is useful to balance out all the colours as they would normally look like in the autumn light.
 |
 |
For the above variation featuring tamarisk, after tone mapping, I used the HSL (Hue-Saturation-Luminosity) dialog to decrease hue to -5 and saturation to -8.
It is, of course, possible to get even more realistic and stunning effects using external filters (such as Color Efex Pro), but these are usually not free and not compatible with all operating systems or graphic applications. I hope you enjoy this tutorial. Now, you may not be able to make it rain or shine in real life, but in your pictures you definitely can.
© La Pensine Mutine. All rights reserved. Reproduction prohibited.


 FR
FR


No comments:
Post a Comment